Hwy 52 Cafe Columbia, Alabama
Notes on workflow
Below is an example of my workflow after someone requested by email. I have purposely chosen a bad photograph of a closed restaurant, so know this ahead of time. My process is used on an iPad mostly and occasionally on my laptop. Most of my work is done from the cab of my truck so I only use Adobe ’s Lightroom and Photoshop software.
1.Take photo ( the fun part).
- a) Download photo from SD card with iPad or laptop. I always use an external hard drive with my laptop. iCloud with the iPad.
- b) (Alternative) if in the field and time is critical and all you can use is your phone then I use the Leica photo app download onto my iPhone and then share by email or text.
- Choose best photos (editing in Lightroom)
-
Post-process the photos in Adobe photoshop only if necessary. Save two copies of images, one for the web 1200px lowest width and 72 dpi and the unsized edited original(s) for archiving. I usually use a PSD file for what I archive. This is critical to have a naming and file directory plan you stick with. I use iCloud if Im in the field and these folders and names match what I have on my external drive. There is no right or wrong way just be consistent. I use the following year 2023, month 02, feb, day 19 then underscore_ shoot , then a number for version. In the phot I will use it looks like this. 20230219_Hwy52cafe-1.jpg. I divide my shoots by year and months so this file will be saved in the 2023 folder and the 02-Feb subfolder. In that folder there will be two subfolders one “edits” and “web”.
- Publish (printing, sharing online, post to blog etc)
- Archive/backup images to second external drive.
- File naming strategy is keep it simple and be consistent.
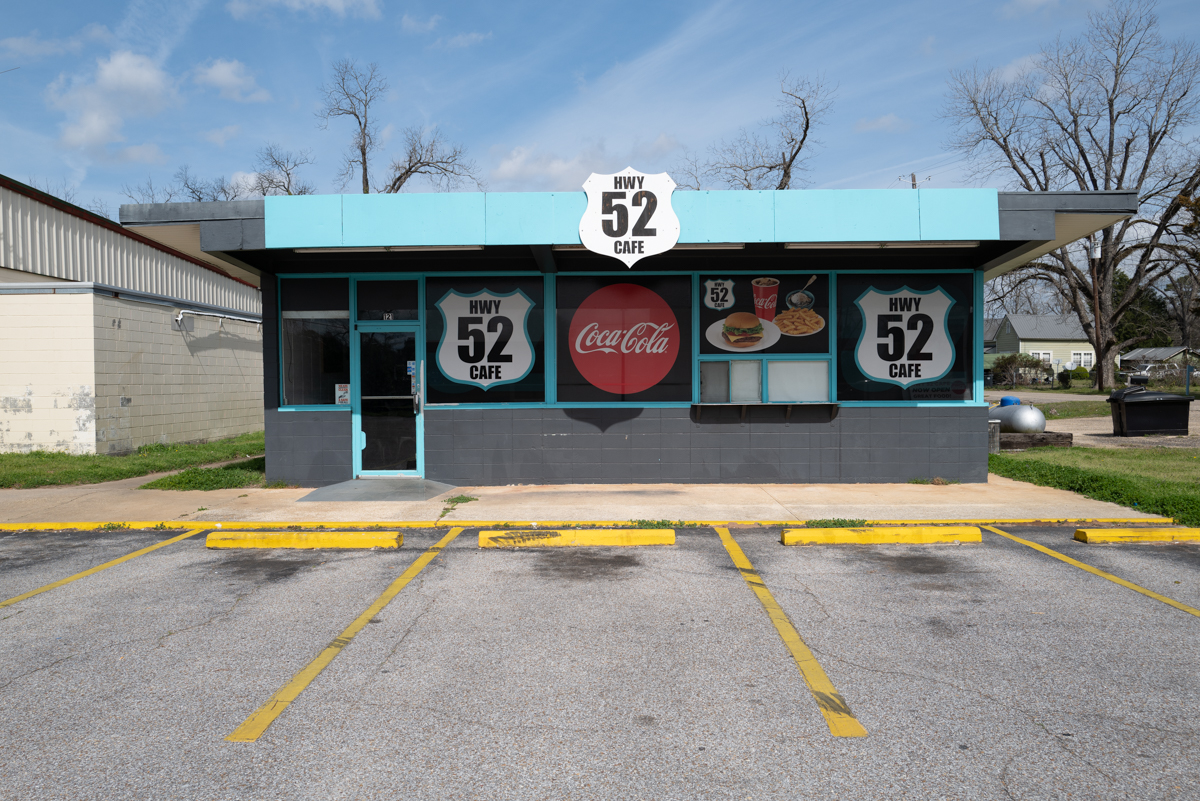
Original image from camera, not a good one.
Step 1: How I edit photos? I use the keep it simple philosophy. For years I spent a lot of time mastering photoshop in part because I used it to create graphics for architecture and city planning projects and over the years this got very complex when it came to site plans and adding certain looks to 3D models. Use the grid display to review your photos and adjust to what allows you to identify each shot. In Lightroom I tend to not use the rating option but either pick ( shortcut key z) or reject (shortcut key x). Then use the “p” key and it will show you only the photos you have picked. The opposite setting to show the rejects you can then delete. If need be for a large shoot such as a wedding etc where a client will be reviewing you can use the rating numbers ( 1, 2,3 or 4) to rate the photos. I usually try to force myself to not do this as it creates a huge number of photos that eventually will get deleted. Be tough on yourself and pick the best images to start with.
I’m not a huge fan of editing photos or using filters. I like to shoot natural light and do minimal editing but there are occasions. In the example photograph Im using it sucks so I will attempt to salvage a usable image. I have a simple rule: one is edit in light room in the ways it does best and use photoshop for the tools for what it is best.
Below are the specific editing steps with an example of a really bad photo of the Highway 52 cafe in Columbia Alabama.
Lightroom has a very simple crop feature the default setting is the proportion of your original shot. Unless your doing a boxed required headshot keep it set to original. Use this only when you must and try not to. If you use it exclusively I have found what happens is you lose the ability to compose in the field when your taking the shot. I know there are different opinions here but I’m a minimal natural approach guy. I want to learn intuitively with the camera how to compose and be instinctive. A example of a more Lightroom intensive editing scenario. Below is a photo I took of a closed restaurant. In this case I used editing in Lightroom form a series of images to achieve a desired “look”. I will go step by step what I did. 1) Crop in light room,
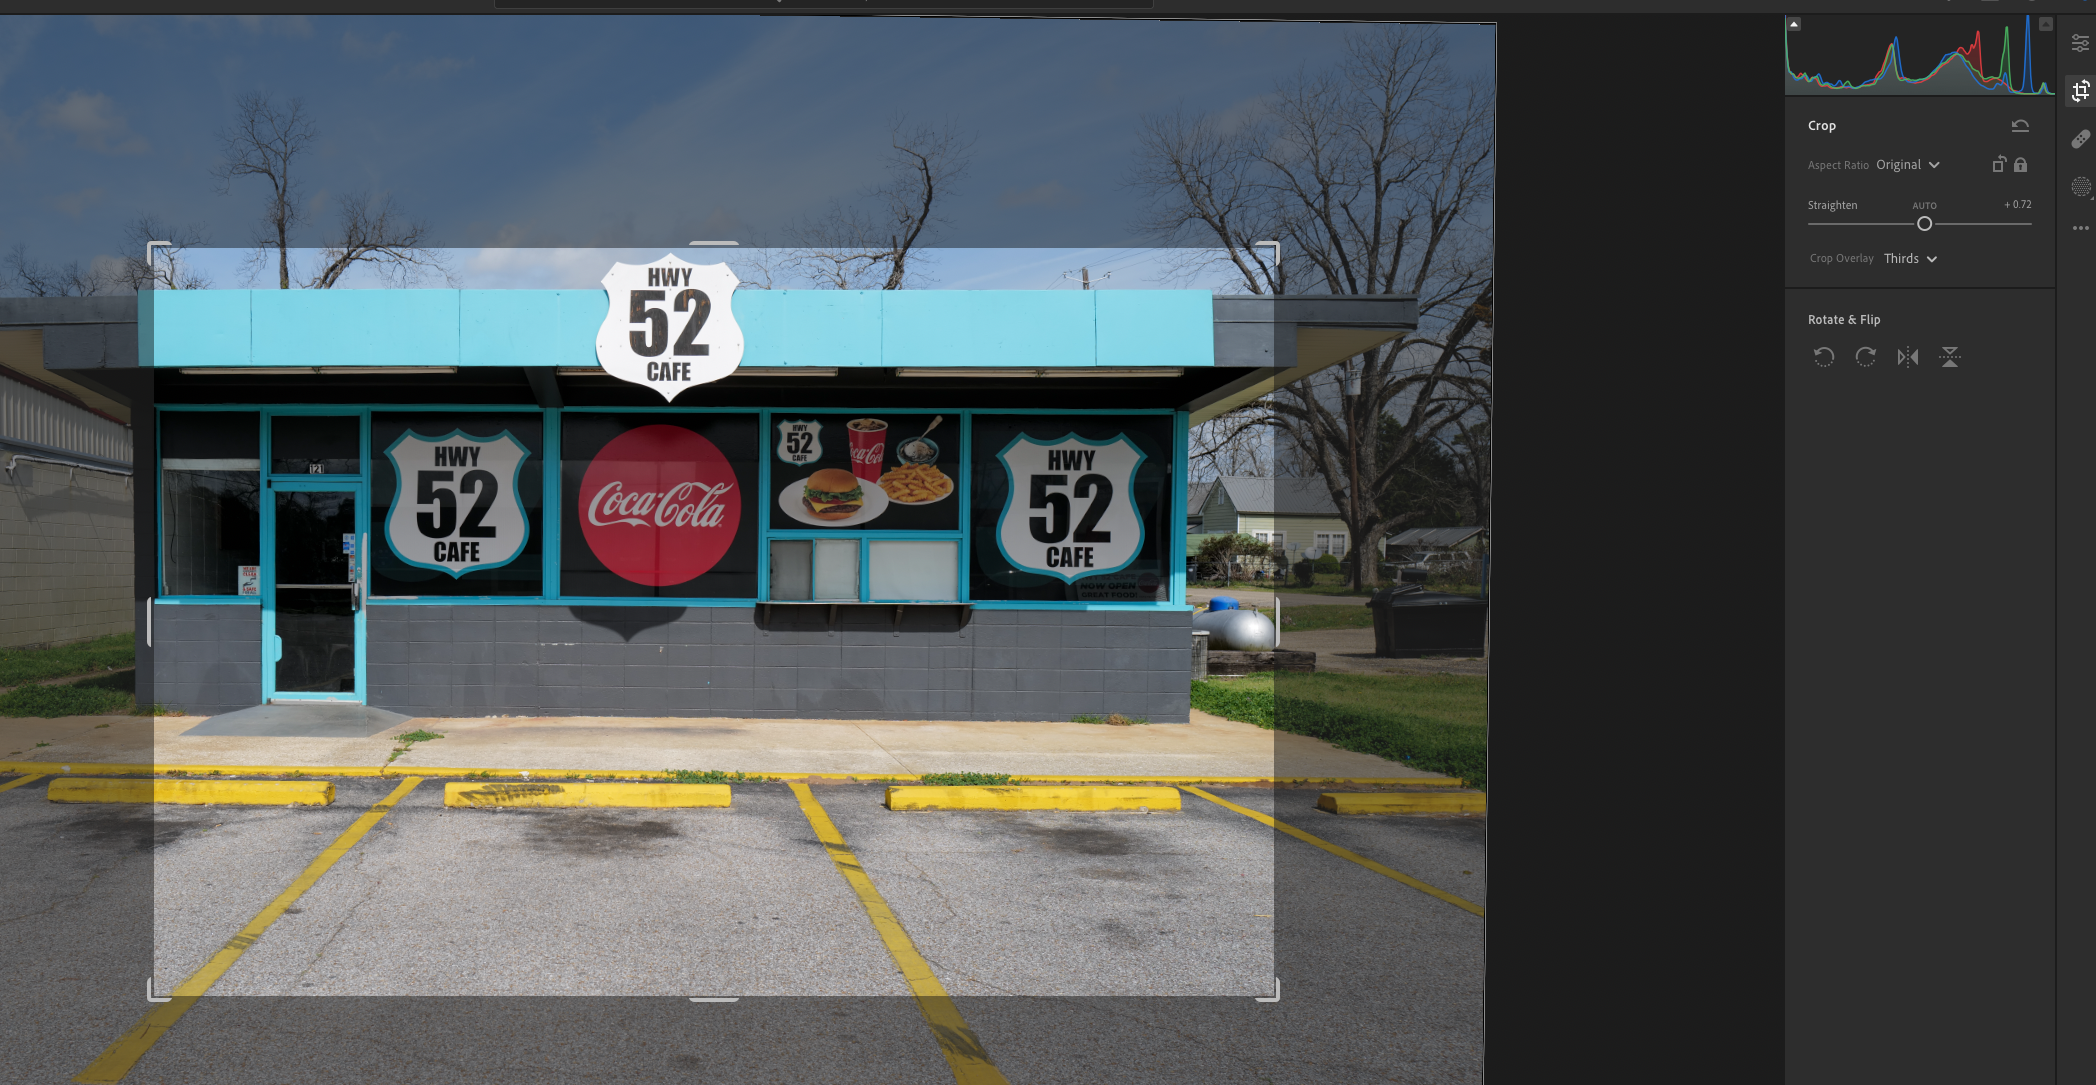
Crop tool in Lightroom
2) Adjust using the settings in the light tab, in this case I adjusted the contrast, highlights, shadows and blacks.
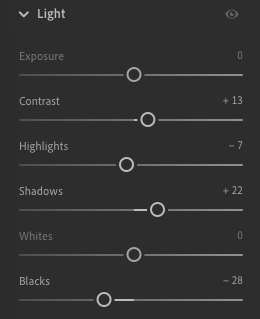
Edits light tab in Lightroom
3) Right click on the image and edit in photoshop.
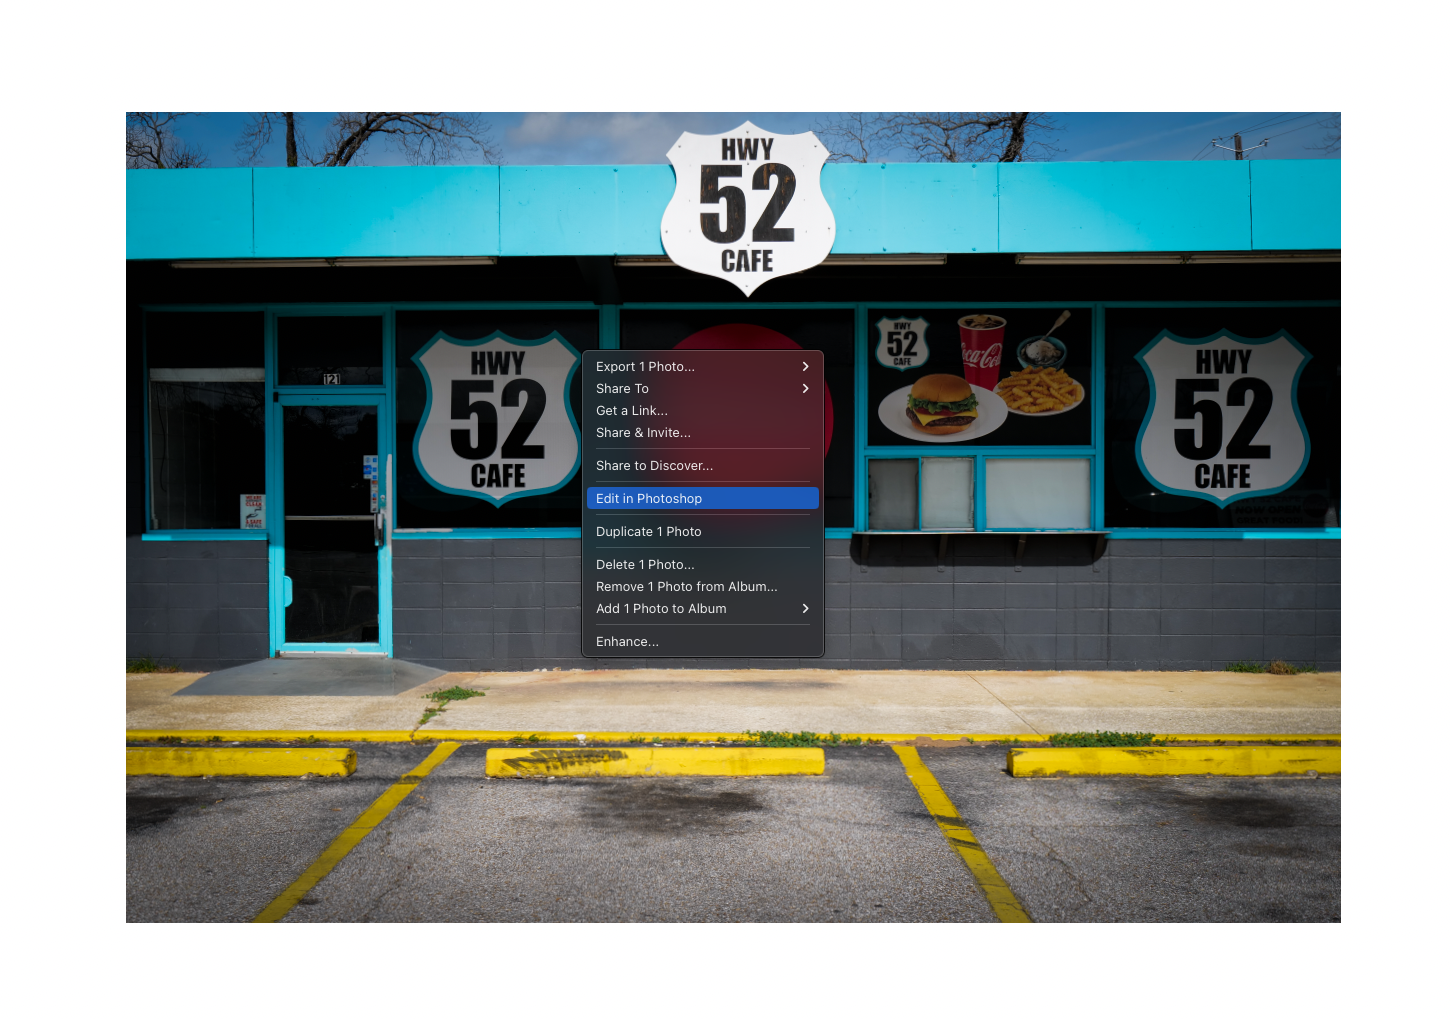
Open the image in photoshop from Lightroom by right clicking
4) In photoshop (Lightroom in the background) you can use the burn and dodge tool if there are areas you want to bring out but that is usually the only tools I use. Any of the other necessary edits can be done quicker in Lightroom. The exception is if you want to finely control a specific area in photoshop. In this case I dodged the yellow stripes which changed the exposure of them relative to the rest of the photo. And I hither sign at the top with the burn tool to darken the highway 52 numbers. Photoshop is also really good to finely adjust a image rotation size. Notice at the top along the roof the line is not perfectly horizontal. The yellow parking stops are though.
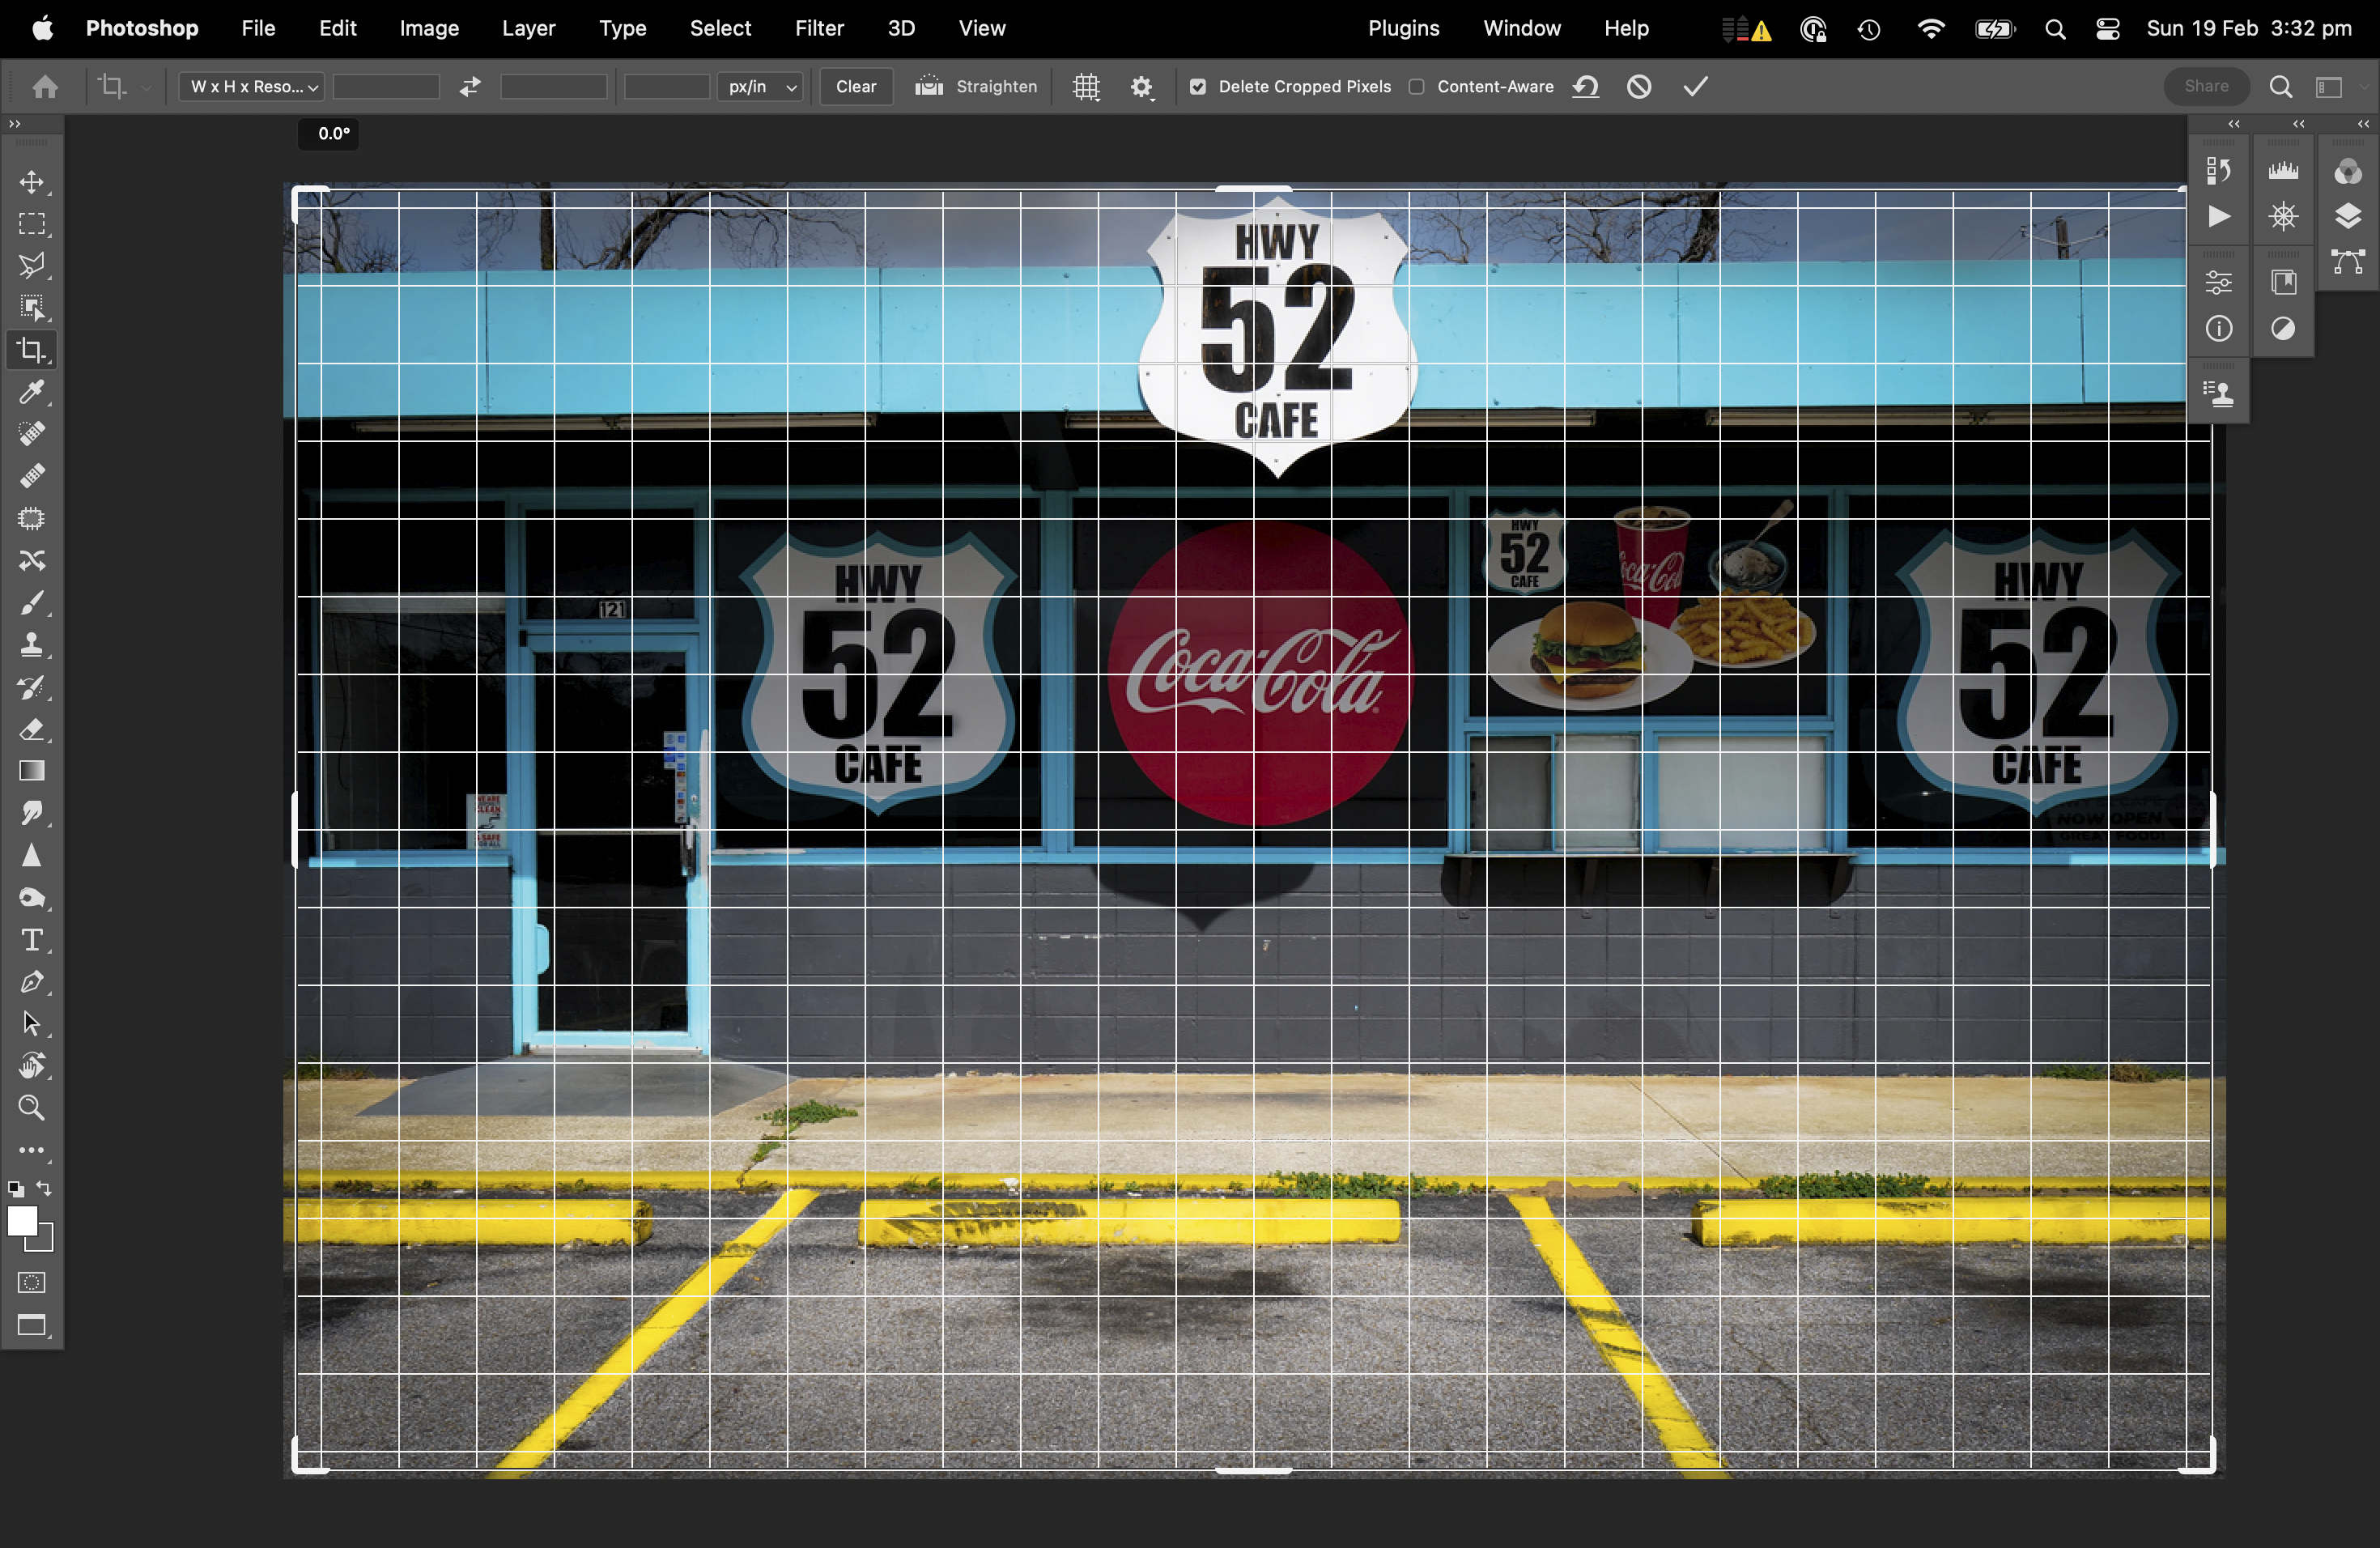
Fine tune with the rotation tool using the the horizontal grid
The tool you see darkened in the toolbar on the left has a really good grid that can be set to pop up when you use it. In this image the roof is noticeable as not being horizontal more than the curbs so I corrected this. Its still not a good photo but it is good to illustrate what can be done with Lightroom and photoshop the way I use it.
I’ll detail how I save and archive images in the next post. Any questions feel free to email me.
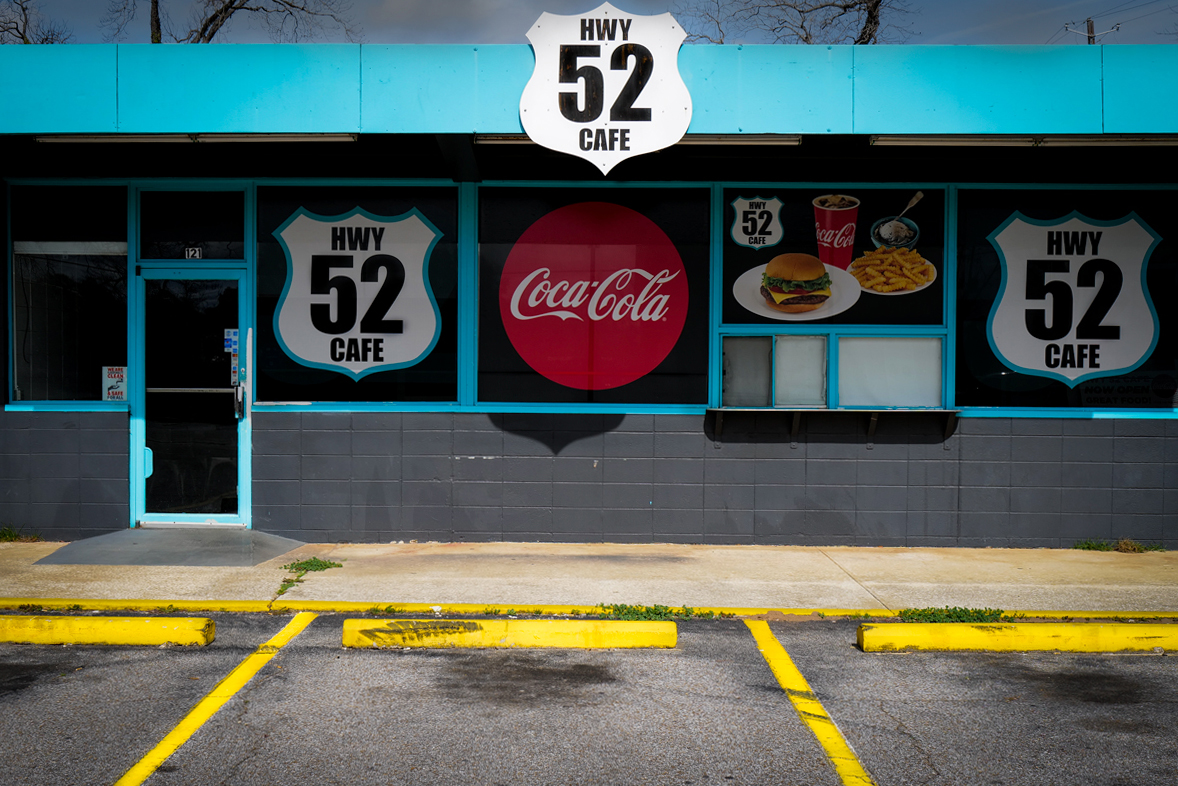
Final image